2 minute read
The DaVinci Resolve 19 public beta is filled with loads of fantastic new features. In this article colorist Blake Jones has a look at two, IntelliTrack and ColorSlice, that really stand out.
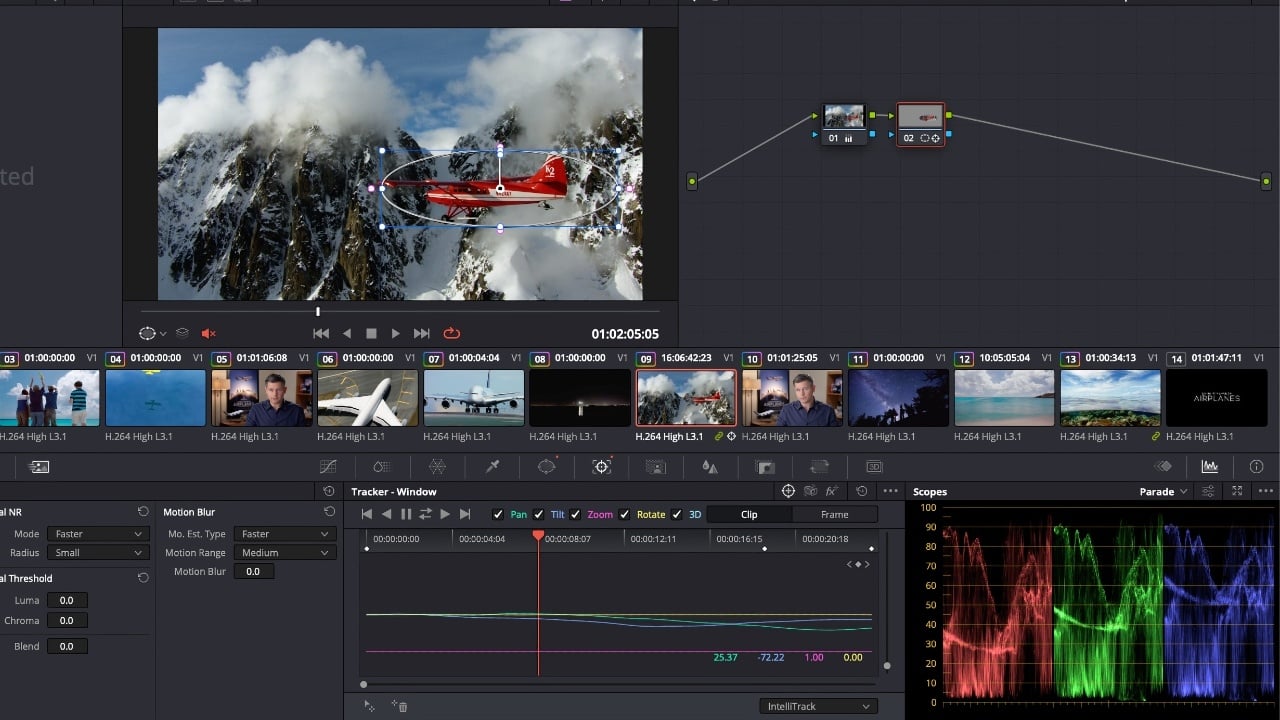
The first is IntelliTrack, which is only available in the paid Studio version of Resolve. IntelliTrack uses AI technology to complement Resolve’s already excellent tracking and stabilization tools. IntelliTrack can also be applied in the Fairlight page in Resolve for audio panning in projects. In this situation let’s look at IntelliTrack being used for Windows tracking. IntelliTrack is simple to use. After creating my Window with Resolve, I proceeded to the Tracking area in Resolve’s Color page. Once there I selected the Tracking mode that by default comes up as Cloud Tracker > IntelliTrack > Add Tracking Point button on the left side of the window.
You’ll then see a tracking point appear in the image. I then moved the tracking point to a high contrast area within the window. I then clicked on the Track Forward and Reverse button. For my example I tracked an airplane flying against mountains. When I used the standard Cloud Tracker, it would get confused with the mountains in the background and try to latch on to the rocky features. When I repeated the process with IntelliTrack, it ignored the mountains and the tracking continued flawlessly. Another example was tracking a person who passed briefly behind a tree during motion. When IntelliTrack was applied, the subject could be tracked without any problems.

What makes IntelliTrack so powerful is that everything is essentially done in the background. Once I established my reference point, IntelliTrack did the rest. Stabilization is also another area where IntelliTrack may be used. As with Windows Tracking, simply select the tracking point and then IntelliTrack does the rest.
Another new function in Resolve 19 is ColorSlice. ColorSlice is essentially a fixed vectored qualification control that can be used to add to your existing primary color correction. What this means is that your scene’s colors are sliced into pie slices. One slice for Red, one for Green and so forth. There is also a preset adjustment for skin tones. Additionally there are also global correction adjustments for Density, Saturation and Hue. Each vector also has a centering control. This control is extremely useful in the event that the color to be adjusted does not land exactly within the fixed vector region. In order to better see this, we also have a Highlight button that will only show the color area being affected for this region. When I also click on the Highlight button in the Viewer area, I will also see the same Highlight effect.

What I find that makes this tool so powerful is that you can perform multiple corrections in a single node. Of course you can also do this within the Curves area in Resolve’s Color page but this allows you to easily fine tune the correction for optimum results. It also means that fewer nodes are required to make a complex grade.
The ColorSlice feature is based around the fixed vector qualifiers that have been with us for quite a while when performing color grading. When I started as a colorist, our only grading tools were primary color correction and secondary color correction, now known as Qualifiers. I found that the red and yellow qualifiers used together allowed me to create beautiful skin tones. This was particularly important when I was grading the older Technicolor films. My goal was to avoid skin tones that were too much on the pink side.
ColorSlice improves upon this by having a Skin preset. This preset does an excellent job of picking up the flesh tone and allowing you to adjust it for optimum results. It’s important to note that Resolve has a Preset Vector function that has been there for a long time. However to use this, it necessitated dedicating a node for each Preset that would be applied. When using ColorSlice it can all be done in a single node and almost no fine tuning is required.
Adding ColorSlice into your workflow is extremely simple. First start off with your Primary color correction in the first node and then in the second node apply your ColorSlice correction to touch up the color and it’s done. This means that you can create a beautiful color grading with even qualification corrections using only two nodes!
Tags: Post & VFX Blackmagic Design DaVinci Resolve

RedShark 2020 @ All rights reserved.

Comments