 Tools of the trade...
RedShark Replay: Roland Denning, a cameraman by trade, lists 11 things that those that live behind the lens should consider when it comes to getting the audio right.
Here’s the thing: sound is often the last thing filmmakers worry about when they shoot but the first thing they notice when it’s not right - audiences can tolerate fuzzy pictures much more than they can tolerate fuzzy sound. Great sound makes good pictures better (although the sound department seldom gets the credit).
I have seen so many student films where great care is taken to achieve beautiful pictures and sound is just left to the camera mic or a mic somewhere the other side of the room.
I’ve been a cameraman most of his life, not a sound recordist, but I’m writing this partly make amends and apologise for all those sound recordist jokes. I’m fully prepared for all the sound recordists out there to point out all the mistakes I’ve made.
So here’s some basic advice - yes, some of it is very basic, so please excuse me if you think I am stating the obvious.
1. A microphone on the camera is rarely the answer
Even on high-end cameras the on-board mic is seldom decent quality but that’s not really the point - the problem is the camera mic is in the wrong place. There are exceptions - if you are shooting exterior cutaways or establishing shots the camera mic will usually be adequate and if you are shooting hand-held with a wide-angle lens you are likely to be near enough to your subjects to pick-up decent sound. But it’s never a solution for interviews.
2. Directional mics are not that directional
Perhaps because gun mics (directional mics) look a little like guns I’ve seen people stand on the other side of the room and point them at the subject, as though they are literally shooting them. Sadly, they don’t work like that and the principles that directional mics depend on tend not to work well in small rooms. You really don’t want that mic more than a metre away from the subject, preferably closer.
3. Don’t scrimp on microphones
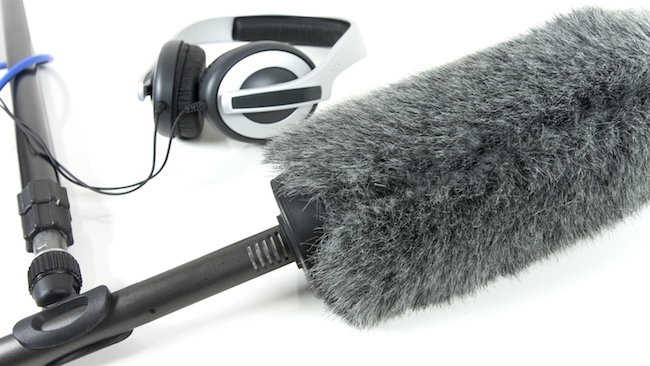
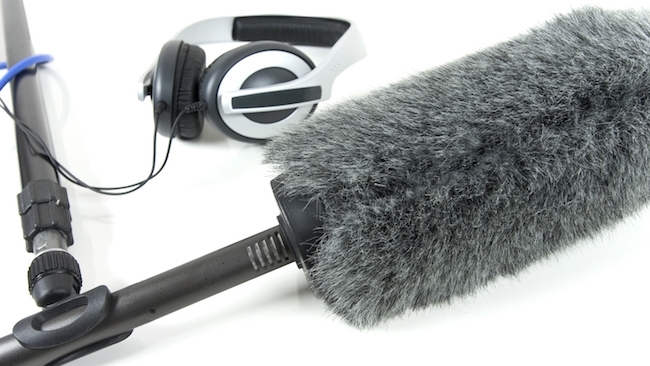
As in most things, you get what you pay for. Get the best microphones you can afford. The essential mic in any video kit is the short gun mic - like the classic Sennheiser 416, but that will set you back at least £600. Thankfully, the Australian company Rode have some excellent substitutes for the 416 in their NTG range at less than half that cost. A mic like this is versatile - you can mount it on the camera, a boom or a stand and you will probably end up using it for 80% of your recording.
Personal mics (also known as lapel mics or lavaliers), whether they are wireless (radio mics) or wired, are an easy solution for interviews. Again, get the best you can - there are some very cheap personal mics out there and they sound cheap and nasty too - don’t expect to get a decent one for under £120.
4. Radio mics are not always the answer either
Now reliable, quality radio mics are relatively inexpensive - like the very popular Sennheiser G3 for around £500 and the new Rodelink Filmmaker for under £300 - there is a tendency to be dependent on them - but they are not always the best for drama. The problem is everyone sounds the same, whether they are close to or far from the camera (see my point 6).
There are also issues of clothing rustle (unless you are prepared for the mic to be visible) and there’s always the problem that if the subjects turn their head as they are speaking, they go off mic. So often the best solution is a mic on the end of a boom pole (see point 7).
5. Forget about stereo
Not entirely - stereo is great for ambient tracks and effects and essential for music but, for interviews and dialogue, it is generally more trouble than it’s worth. Getting the microphone in the right place for a correct stereo image as well as getting it out of shot without casting shadows is a tough call - it is much easier to pan voices left and right in post-production. On location, recording interviews or dialogue in stereo inevitably picks-up more ambient sound when what you’re after is the voice as clean as possible. If you want a stereo ambient track, record it separately.
6. Perspective is important
It may seem obvious but it is still worth stating - the sound you are recording has to make sense in the physical space of the picture. I’ve seen experienced studio recordists working on a film shoot for the first time putting a microphone where they think they will pick-up the cleanest sound, not realising that the subject is walking away from their microphone and towards the camera. I hope I don’t have to point why that would sound totally wrong.
Even though the most common problem when people start to make films is to put the mic too far away from the subject, you don’t want to mic everything close. Particularly if what is making the noise is not close to the camera.
7. Boom swingers are worth their weight in gold
Perhaps not literally (there are some very large boom swingers around) but a good boom swinger (or boom op) who puts the mic in the right place is simply invaluable. A boom swinger will compensate for voices that are at different levels by moving the mic away from the loud voices and closer to the quiet voices (something you can’t do simply by adjusting the gain on the recorder as doing that also adjusts the level of the background sound).
8. Cooperate with the rest of the crew
I once worked for a TV channel (which shall remain nameless) where a studio lighting guy and a sound engineer had a long-running feud. If they were put on the same programme together, the former would light the set so it would be impossible to place a mic boom without getting a shadow (and guess who got the blame). This makes life hell for everyone.
9. Free the sound recordist
The rise of the DSLR for video work has been accompanied by the use of separate audio recorders (the audio abilities on cameras designed for shooting stills is rarely up to scratch). There are some great value multi-channel audio recorders available now from companies like Zoom and Tascam but there is a strange tendency to bolt them to the bottom of the camera. Why? Let the sound recordist roam free - just record a guide track on the camera and sync up to the audio tracks in post (yes, a clapperboard is handy).
The recordist can then happily pick up wild tracks and ambient tracks while the camera department is fiddling around with the camera.
On the subject of audio recorders we should celebrate the fact that whereas in analogue days the ubiquitous tape recorder was the Swiss-made Nagra - a superbly engineered machine that cost many thousands of pounds, you can buy a good quality multi-track digital recorder for well under a couple of hundred. When once it was common practice to mix everything as you shot onto a stereo or even mono Nagra, now we can record 4, 6, 8 or even 10 tracks simultaneously on a machine that probably cost the same price as the Nagra carrying case. Strangely, most video cameras still have only 2 audio tracks - this seems an unnecessary restriction in the digital age.
Just one warning - the weak spot of low cost digital recorders is the analogue part - the mic pre-amps. On cheap digital recorders they can be noisy and introduce unacceptable levels of hiss, particularly with low-output microphones.
10. Don’t forget the buzz track
Buzz track or room tone is the sound of the room when no one is talking. It is essential when you are cutting dialogue to fill in the gaps - typically when you have taken a word out and need to replace it with a pause. It is easy to forget to do it. You probably only need a few seconds of it but it’s nice to have more. I have met recordists who make recording the buzz track into a solemn ceremony and they relish the moment when they can command everyone to be silent and still for as long as possible. If they take this too seriously it is a cue for the more juvenile members of the crew to attempt to induce giggles in others.
11. Monitor the sound as carefully as you monitor the picture
Sound creates textures, mood, atmosphere. It has a huge effect on the way we watch and absorb a scene, often without us realising it.
Graphic by Shutterstock
Tags: Audio


Comments